


Next.js is one of the frameworks of React.js which provides a bunch of features inbuilt in it and very popular to make an app server-side rendered.
A brief about Server Side Rendering (aka SSR):-
As the name speaks it itself, in server-side rendering pages renders in the server and then loads in the browser. which is highly recommended to improve the SEO of the site. Here is a detailed article.
If you see in the above article, SSR needs to be implemented in React.js while in Next.js it comes as one feature.
What's the problem of SSR?
Well if you are serving static pages from SSR then it'll not cause many problems for you but while making dynamic pages where information is being filled through any type of API then It'll start to cause problems of timing to first render(TTFB).
It means when you request any page to the server. first, it'll trigger used Next.js Data fetcher to request data from other servers and wait until it's received and then it'll create and return the page back to the browser. So, till then every user has to stare at a white screen or beautiful loader. The problem is, in most cases, we are requesting the same data from the server, and the user has to wait again and again.
Solution
Simply we can cache our rendered pages on the server and use it for next time. We can enable this caching into our custom server of Next.js. Now, let's see how to do it with minimal efforts. 🤔
Next Redis Cache
Next Redis Cache is a package to provide caching of next.js pages with all needed controls. so, let me share how we can use it?
Installation :
Use the package manager npm or yarn to install next-redis-cache.
npm install next-redis-cache --save
with yarn package manager.
yarn add next-redis-cache
Use inside the custom server
Inside of the custom server, you will need Redis Database initialized as described for example.
Use as a middleware
server.js
const express = require('express')
const next = require('next')
const NextRedisCache = require('next-redis-cache')


const port = process.env.PORT || 3000
const development = process.env.NODE_ENV !== 'production'
const app = next({ dev: development })
const handler = app.getRequestHandler()
const client = redis.createClient()

/**
 *  Initialization of Next Redis Cache instance
 */
const nextRedisCache = new NextRedisCache(client, app, {
  includes: ['/'],  // routes to include for caching
})

app
  .prepare()
  .then(() => {
    const server = express()

    server.get('*',
      (request, response, nxt) => nextRedisCache.middleware(request, response, nxt),
      (request, response) => handler(request, response)
    )

    /* starting server */
    return server.listen(port, error => {
      if (error) throw error
      console.log(`> Ready on http://localhost:${port}`)
    })
  })
  .catch(error => new Error("Server isn't responded", error))
Use as a handler
- To use Next Redis Cache as a request handler just replace Next.js app's handler with nextRedisCache.handler in above snippet, as give in-below.
server.js
    server.get('*', (request, response) =>
      nextRedisCache.handler(request, response)
    )
Here, an Instance of NextRedisCache initialized with three arguments as following.
| Name | Type | Required | Default |
| Client | Redis Client | ✅ | |
| App | Next.js App | ✅ | |
| Config | Configuration Object | ❌ | {} |
Configuration
Next Redis Cache comes with some extra controls to manage your Redis database and page's caching. ( it's all in your hand ).
All you need to know about the config object.
| Key | Detail | Type | Example | Default |
| includes | Collection of specific routes which should be cache. | Array | ['/', '/blogs/(.*)'] | [] |
| excludes | Collection of specific routes that shouldn't be cached. | Array | ['/cart', '/(.*).js'] | [*] |
| defaultExpire | Expiration time to expire your cache after a particular time. Note: null value of this key will set the cache permanently. | Number (Seconds) | 3000 | null |
| expire | To define different expiration times for different routes. | Number (Seconds) | 3000 | null |
| cache | To disable caching permanently by setting it false. | Boolean | true | true |
| prefix | To identify your cache in-store by the unique prefix. | String | "my-cache" | "my-cache" |
| log | Log timing of get/set to monitor caching | Boolean | true | false |
Note : includes and excludes is using path-to-regexp to validate routes.
Results
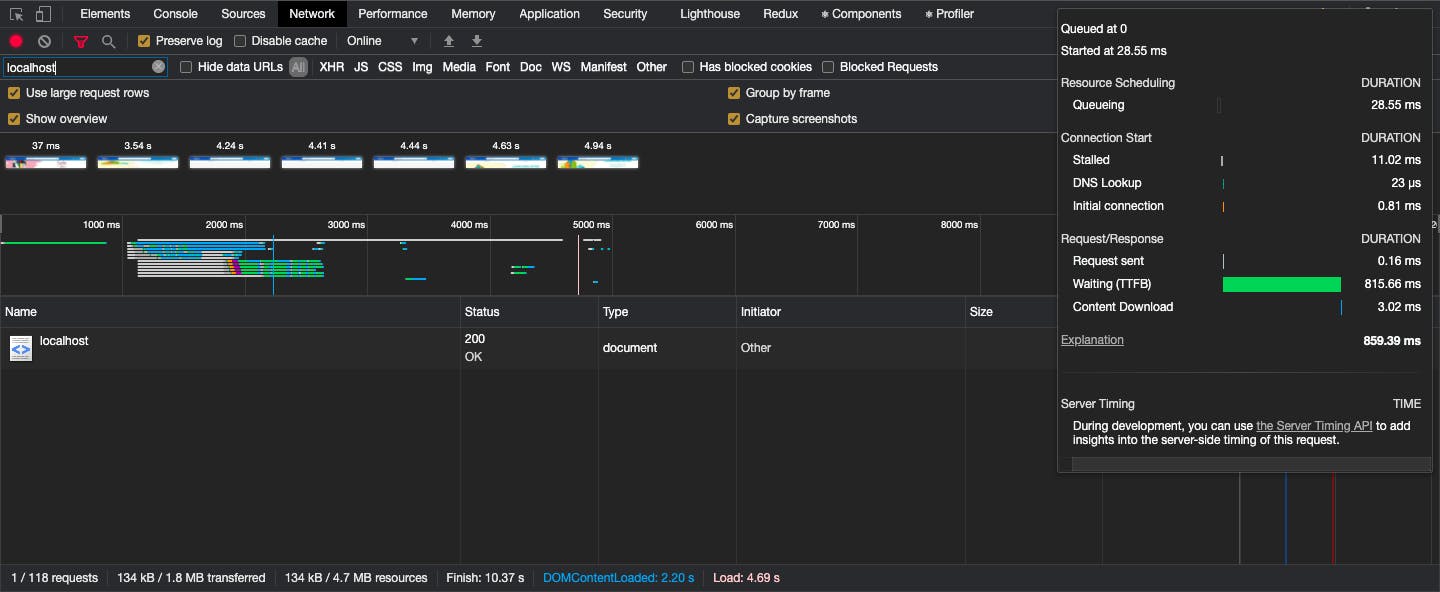
On first time rendering of Next.js page ( directly from Server )
Second time rendering of Next.js page ( from Redis store )
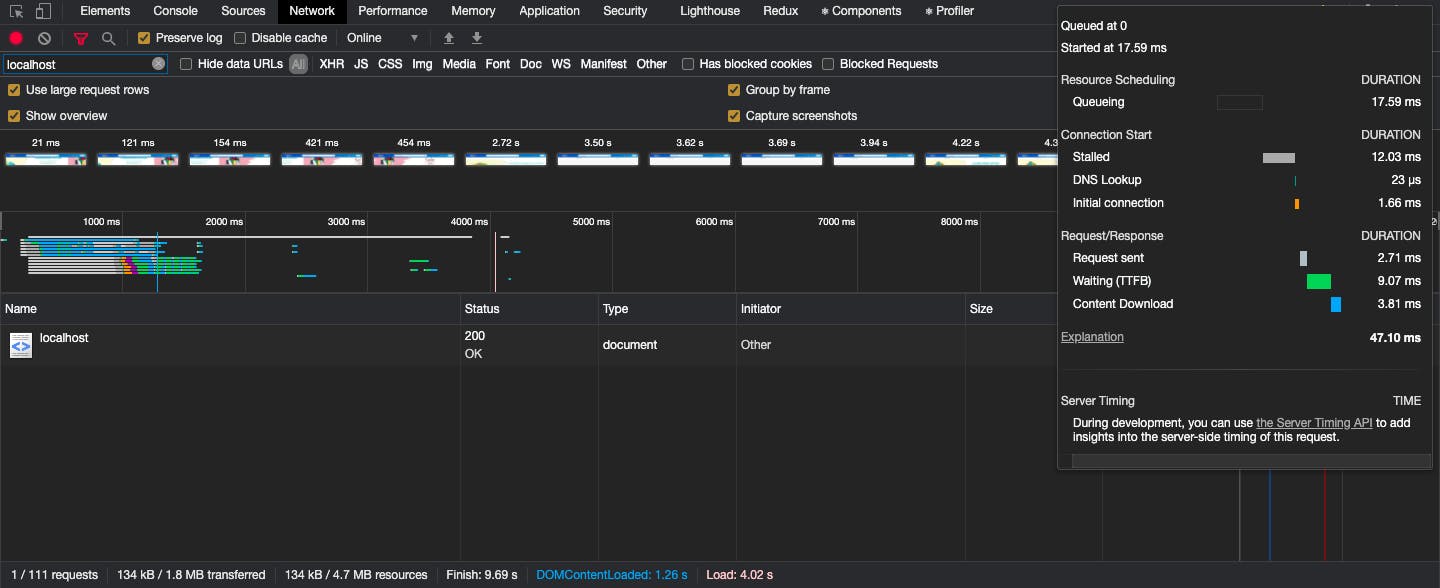
Here, we can see the difference of TTFB time from both screenshots.